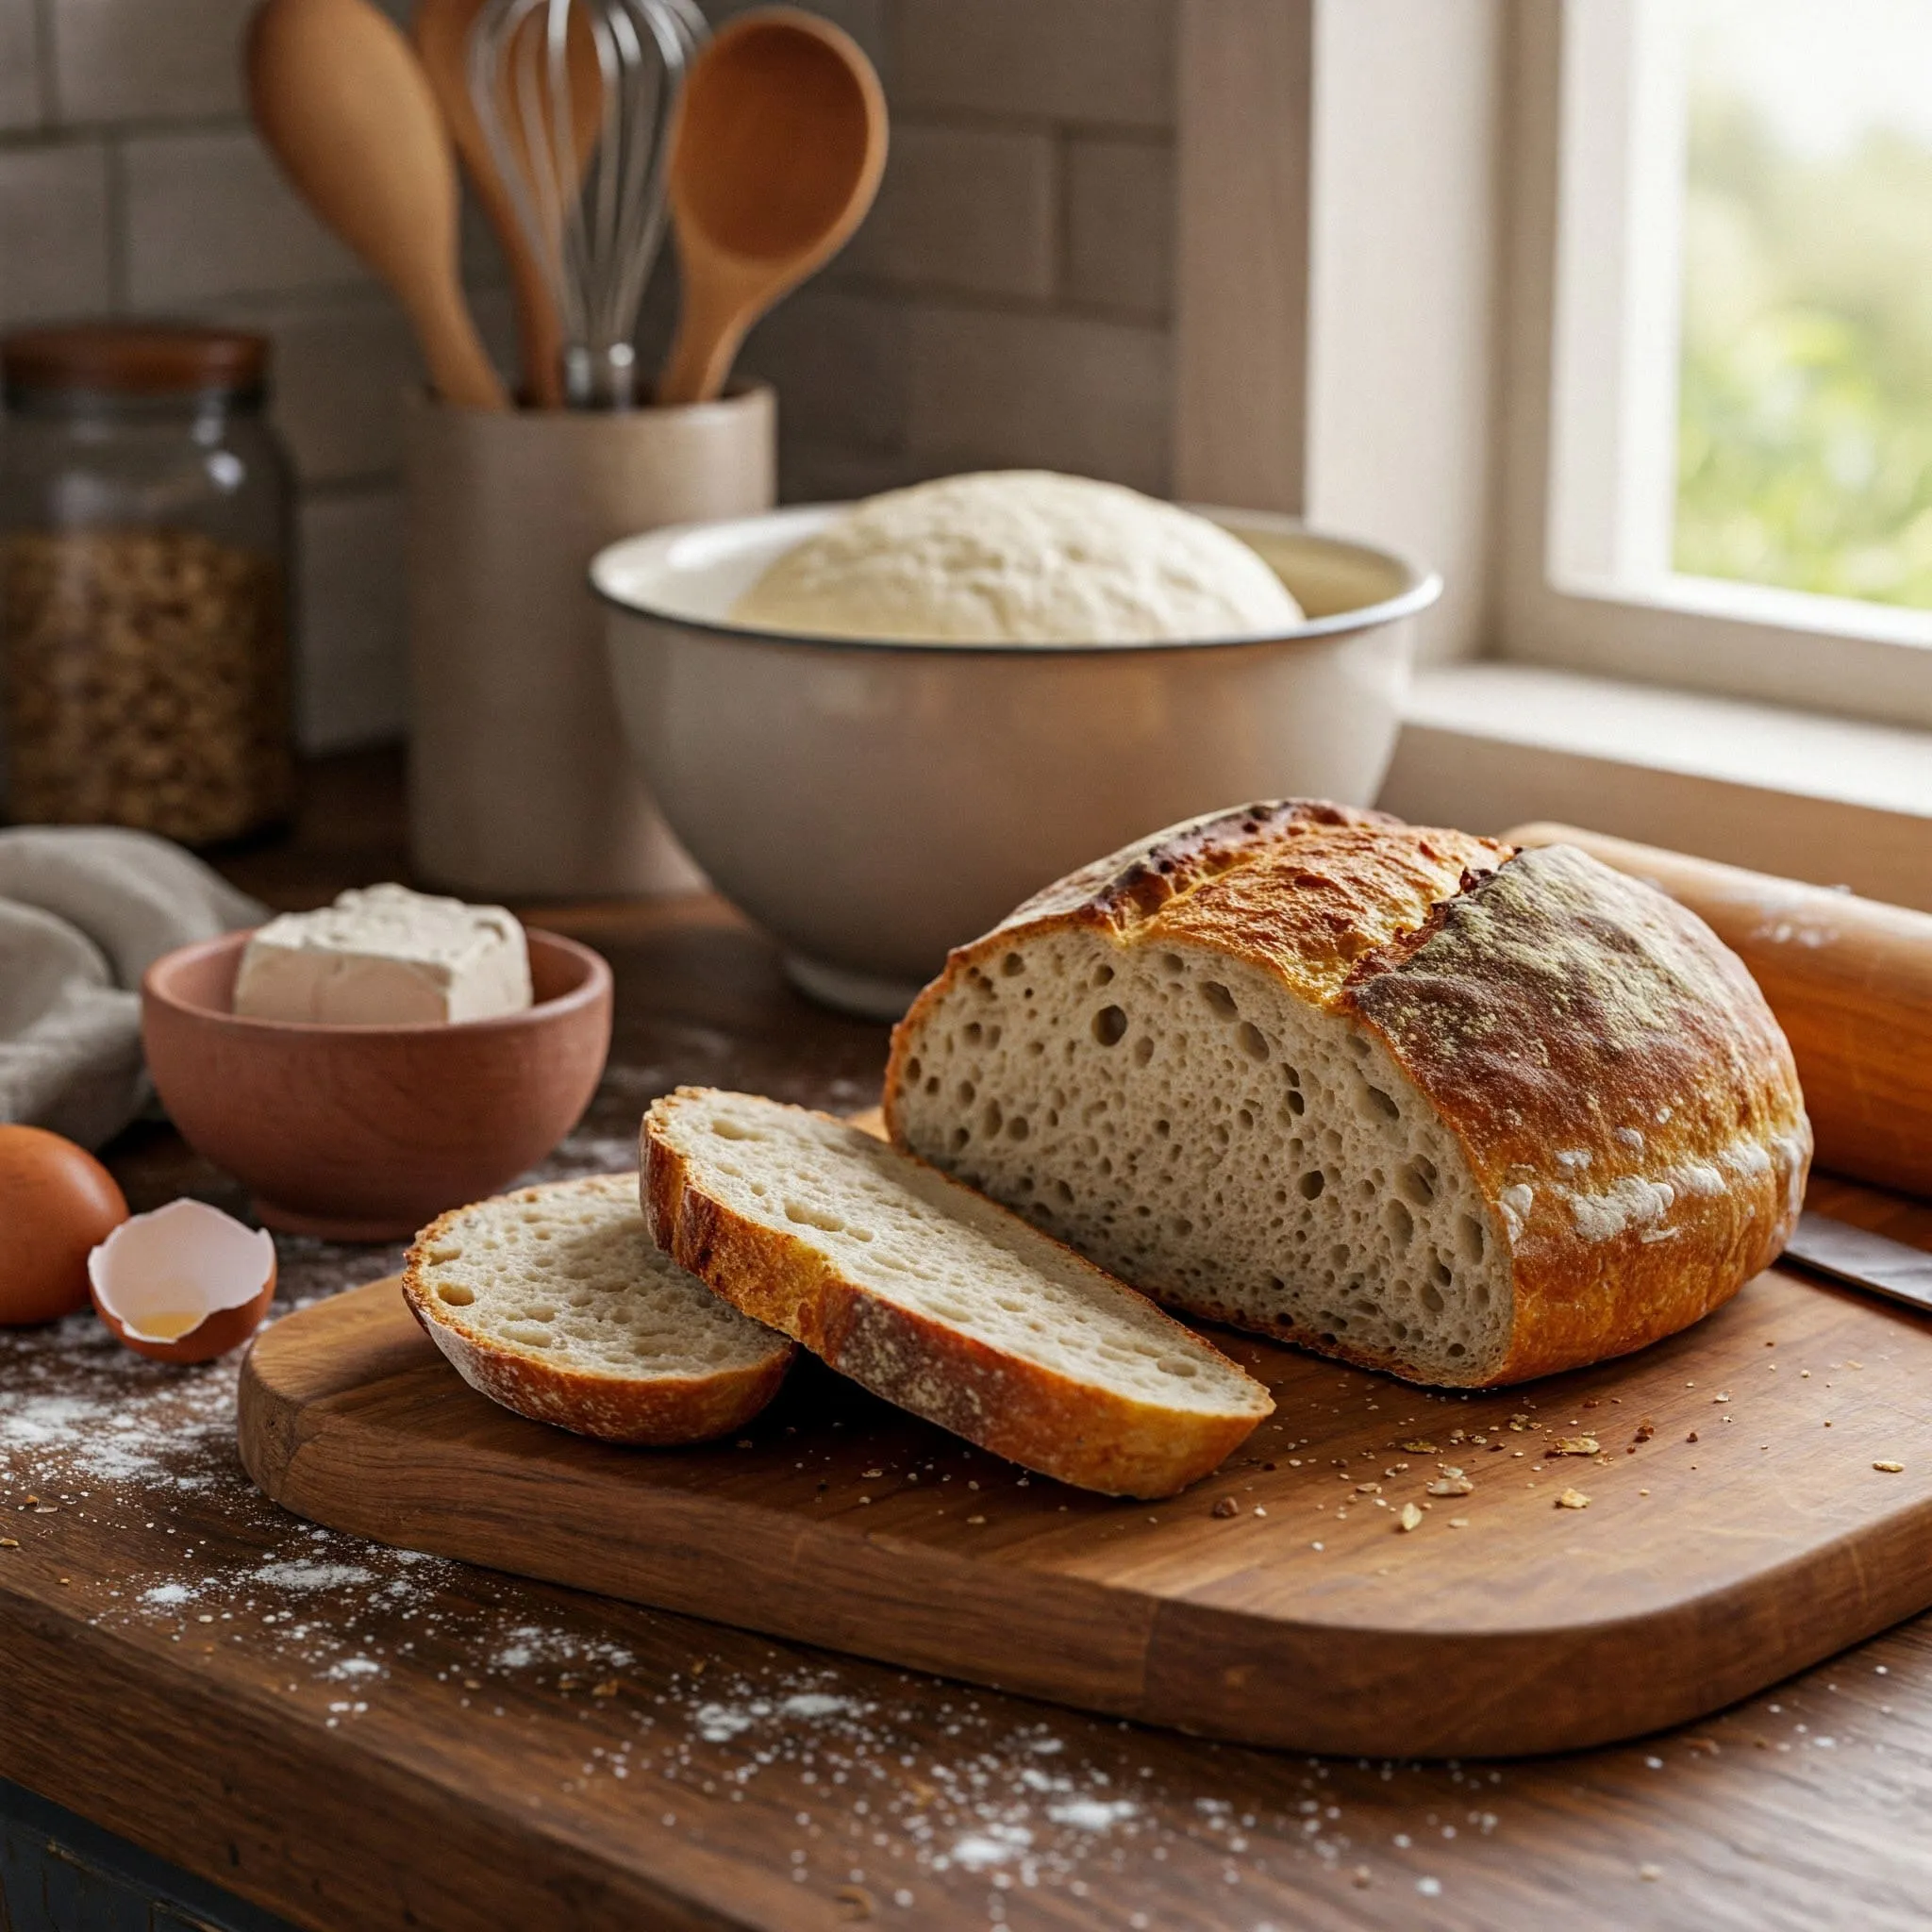
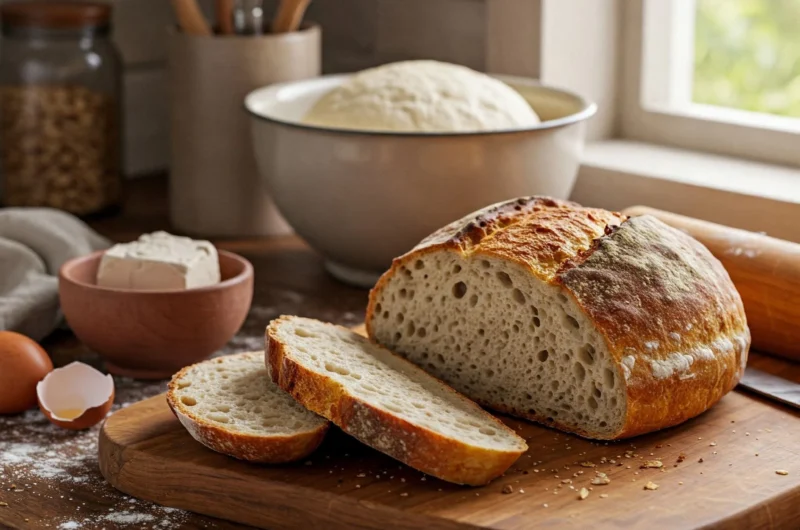
Baking bread at home is a rewarding experience, especially for beginners. It may seem intimidating at first, but with the right guidance, you can easily turn simple ingredients into a warm, soft loaf. This easy beginner bread recipe simplifies the process, making it perfect for anyone, regardless of their baking experience. The result is a delicious loaf that’s sure to impress, and you’ll enjoy the satisfaction of making it yourself.
Homemade bread has many advantages. You can control the ingredients, ensuring no preservatives or additives. Plus, it’s more affordable than buying from the store. The recipe uses simple ingredients like flour, yeast, water, and salt—items you likely already have at home.
The best part of this recipe is its simplicity. You don’t need fancy equipment or advanced techniques. Whether you mix by hand or use a stand mixer, the bread comes together easily. In this post, we’ll guide you through each step, ensuring you feel confident. By the end, you’ll be ready to bake your first loaf and eager to try more recipes in the future!
Jump to RecipeWhy Baking Bread at Home is So Rewarding

The Joy of Homemade Bread
There’s something truly special about baking your own bread. The moment you pull a golden, perfectly risen loaf out of the oven, it’s a sense of accomplishment that few other kitchen experiences can match. The process of transforming simple ingredients—flour, water, yeast, and salt—into a warm, delicious loaf is immensely satisfying. The smell that fills your kitchen as it bakes is enough to make the effort worth it. Whether you enjoy it as a cozy breakfast or serve it alongside a family dinner, homemade bread always tastes better because you know you made it with your own hands.
Healthier Alternatives
One of the biggest benefits of baking bread at home is the control you have over the ingredients. Unlike store-bought bread, which often contains preservatives, additives, and artificial ingredients, homemade bread is free from these chemicals. By baking your own bread, you ensure that only fresh, wholesome ingredients make it into your loaf. You can even opt for healthier alternatives, like whole wheat flour or adding seeds for extra nutrition. This gives you peace of mind, knowing exactly what you’re eating and offering a cleaner, healthier option for you and your family.
Cost-Effective
Making bread at home is also incredibly cost-effective. A loaf of homemade bread typically costs just a few dollars to make, while store-bought artisanal bread can be quite expensive. Additionally, the ingredients used for baking—like flour, yeast, and salt—are very affordable and can be used for several loaves. By baking regularly, you’ll find that the cost of purchasing high-quality bread at the store quickly adds up. Over time, making your own bread can save you a significant amount of money, all while giving you the freedom to enjoy fresh bread whenever you want.
Perfect for Beginners
If you’re new to baking, this beginner bread recipe is the perfect way to get started. The recipe is simple and doesn’t require any complex techniques or specialized tools. It’s designed to be approachable for anyone, even those who’ve never baked before. You’ll learn the basics of dough mixing, kneading, and proofing in a way that’s easy to follow and understand. As you practice and gain confidence, you can start experimenting with different ingredients and methods, gradually expanding your baking skills. This beginner-friendly recipe ensures that your first experience with baking bread is successful and enjoyable.
Essential Ingredients for Your Easy Beginner Bread Recipe
Flour: Why Choosing the Right Flour is Important
Flour is the base of your bread, so choosing the right type is crucial. Bread flour has more protein than all-purpose flour, which helps create the right texture. It produces a chewier, more structured loaf. All-purpose flour, while versatile, makes a softer, less chewy bread. For the best results, choose bread flour for a hearty loaf with great texture and structure.
Yeast: Understanding the Role and Choosing the Right Type
Yeast causes the dough to rise by feeding on sugars and releasing carbon dioxide. There are two main types: active dry yeast and instant yeast. Instant yeast dissolves easily and doesn’t need to be proofed, making it more convenient for beginners. Active dry yeast must be dissolved in warm water first. Both types work well, but instant yeast is easier for newcomers to handle.
Water and Salt: Temperature and Proportions Matter
Water and salt play a big role in the dough’s texture. The water temperature should be between 100°F and 110°F (37°C to 43°C). Too hot or too cold can affect the yeast’s activation. Salt enhances flavor and controls yeast activity. It also strengthens the dough’s structure. Be careful with the amount, as too much salt can inhibit the dough’s rise.
Optional Ingredients: Customize Your Bread
While the basic recipe requires only flour, yeast, water, and salt, you can add extras to customize your bread. Herbs, like rosemary or thyme, add flavor. Seeds, such as sesame or sunflower, create texture and crunch. Sweeteners, like honey or sugar, give the bread a slight sweetness. You can also experiment with whole wheat flour or oats for added nutrition and flavor.
Common Mistakes to Avoid When Baking Bread at Home

Over-Kneading the Dough: Why Less is More
Kneading the dough is an important step in bread-making as it helps develop gluten, which gives the bread its structure and chew. However, over-kneading the dough can lead to a tough loaf. When you knead the dough for too long, the gluten becomes overly developed, making the bread dense and hard. The dough should be kneaded just enough to form a smooth and elastic texture. A good rule of thumb is to knead for about 8-10 minutes by hand, or around 5-6 minutes with a stand mixer. If your dough feels firm and elastic without being overly stiff, you’ve kneaded it enough. Remember, less is more when it comes to kneading!
Incorrect Yeast Handling: The Dangers of Using Water That’s Too Hot or Cold
Yeast is a sensitive organism, and the temperature of the water used to activate it is crucial. Water that’s too hot can kill the yeast, preventing it from doing its job and causing the dough to not rise properly. On the other hand, water that’s too cold will slow down or stop the yeast from activating, leading to a weak rise. To ensure your yeast works effectively, always use water between 100°F and 110°F (37°C to 43°C). You can check the water temperature with a kitchen thermometer or test it with your finger—it should feel warm, not hot or cold. This simple step ensures that your yeast will activate properly and produce a light, fluffy loaf.
Not Allowing Enough Rise Time: The Importance of Patience
One of the most important factors in getting a great loaf of bread is allowing enough rise time. During the rise, the yeast ferments and produces carbon dioxide, which makes the dough expand. Rushing this step can result in dense, heavy bread. The first rise typically takes 1-2 hours, but you should let the dough rise until it has doubled in size. The second rise, after shaping the dough, should also take time—around 30 minutes to 1 hour. If you don’t allow the dough enough time to rise, you’ll miss out on the fluffiness and light texture that makes homemade bread so enjoyable. Patience is key here, as it ensures the dough has ample time to develop its structure and flavor.
Baking at the Wrong Temperature: How to Ensure Your Bread is Baked at the Right Temperature
The temperature of your oven plays a crucial role in baking the perfect loaf of bread. Baking at the wrong temperature can affect the bread’s texture and the color of the crust. If your oven is too hot, the bread may brown too quickly on the outside, leaving the inside undercooked. If the temperature is too low, the bread may take longer to bake, resulting in a dense loaf with a pale crust. For most bread recipes, the ideal baking temperature is between 375°F and 450°F (190°C to 230°C), depending on the type of bread you’re making. Make sure to preheat your oven before placing the dough inside. Using an oven thermometer can also help ensure that the temperature is accurate. Proper baking temperature is essential for achieving that golden, crisp crust and fully cooked, airy interior.
Easy Beginner Bread Recipe: Your Step-by-Step Method to Success
Easy Beginner Bread Recipe: A Simple Way to Make Fresh Bread at Home
Course: BreadCuisine: HomemadeDifficulty: Easy8-12
servings15
minutes30
minutes150-180
kcalIngredients
3 cups bread flour (or all-purpose flour)
1 packet active dry yeast or instant yeast
1 tablespoon sugar
1 teaspoon salt
1 ¼ cups warm water (100°F to 110°F)
1 tablespoon olive oil or vegetable oil
Directions
- Activate the yeast: In a small bowl, combine the warm water and sugar. Stir until the sugar dissolves, then add the yeast. Let it sit for about 5 minutes until the yeast becomes frothy. If using instant yeast, you can skip this step.
- Mix the dry ingredients: In a large bowl, combine the flour and salt.

- Form the dough: Add the activated yeast mixture (or instant yeast if you’re using it directly) and the oil to the dry ingredients. Stir until the dough begins to come together.
- Knead the dough: Turn the dough out onto a floured surface and knead it for 8-10 minutes until it becomes smooth and elastic. Add more flour as needed, but be careful not to add too much.
- First rise: Place the dough in a lightly oiled bowl. Cover it with a clean cloth or plastic wrap, and let it rise in a warm spot for about 1-2 hours, or until it doubles in size.
_11zon")
- Shape the dough: After the dough has risen, punch it down to release the air. Shape the dough into a loaf by rolling it out and folding it over itself. Place the loaf in a greased bread pan.
- Second rise: Cover the loaf with a cloth and let it rise for 30 minutes to 1 hour until it has puffed up.
- Bake: Preheat your oven to 375°F (190°C). Bake the bread for 25-30 minutes or until the top is golden brown and the bread sounds hollow when tapped.
- Cool: Allow the bread to cool on a wire rack for at least 10-15 minutes before slicing. Enjoy your homemade loaf!
Notes
- For a fluffier loaf, you can add a tablespoon of honey or a teaspoon of vinegar to the dough for extra rise.
If you prefer a crustier bread, you can place a pan of water in the oven while baking to create steam.
Baking bread at home doesn’t have to be intimidating, even for beginners. This easy beginner bread recipe proves that with a few simple ingredients, a little patience, and some basic techniques, anyone can enjoy the satisfaction of homemade bread. Not only does it provide a delicious and fresh loaf, but it also gives you complete control over the quality and ingredients of your bread. Whether you’re looking to save money, avoid preservatives, or simply enjoy the joy of baking, this recipe is a great starting point. So, gather your ingredients, give it a try, and experience the rewarding process of baking your own bread from scratch!